0:25 AM How Gurus Add Circles Text Effect |
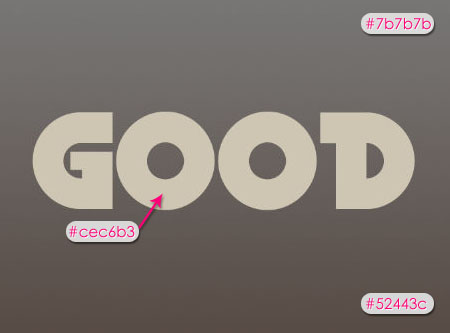
Circles Text EffectIn this tutorial we will be creating a neat "retro-ish” text effect, using a nice circles pattern, and applying some layer styles and filters. The Final Result: Notes: * the software used in this tutorial is Adobe Photoshop CS5 Extended Resources: * Circles Text Effect Color Palette Step 1: Then, create your text using a bold retro font. The font used in this tutorial is "Becker Black NF”, the size is (175)px, and the color is #cec6b3.
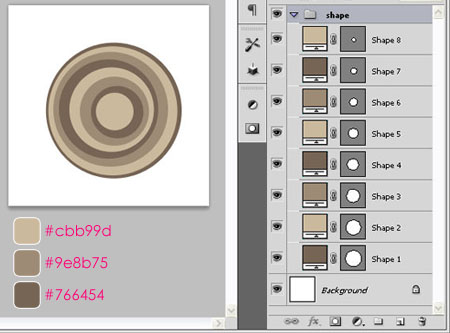
Step 2: Using the Ellipse Tool, start drawing some circles inside each other. Make sure that the circles are in separate layers (not added to each other). Drawing the circles with different distance from each other makes the result more dynamic. Use three shades of a color: a light one, a medium one, and a dark one, and change the fill color of the circles you’ve just drawn accordingly. When you’re done, group the layers and rename the group to "shape”.
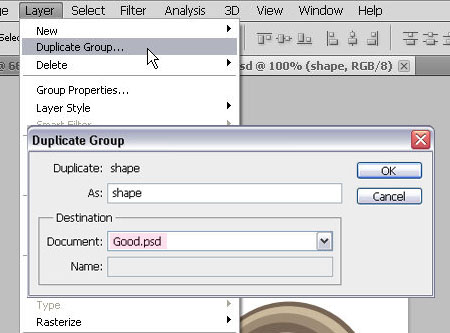
- Make sure the group is selected, go to Layer -> Duplicate Group, and duplicate the group to the original document you are working on.
Step 3:
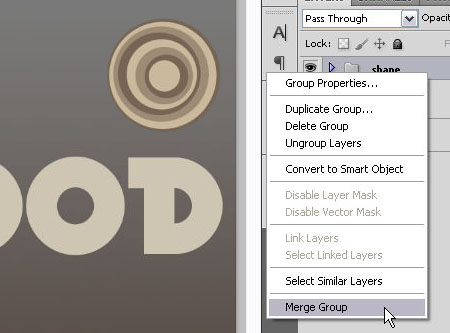
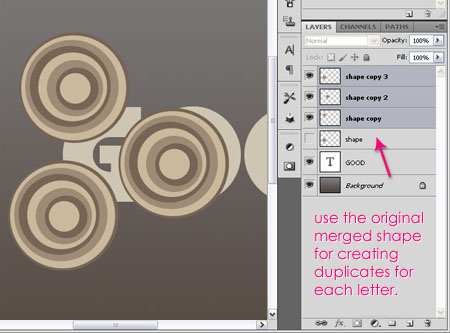
- Create duplicates of the merged group, and start placing them the way you like around the first letter. Do NOT use the original merged shape, because you will need it to create duplicates for each letter, so after you create the duplicates each time, make the original shape layer invisible (by removing the eye next to it), then make it visible again to create more duplicates, and so on.
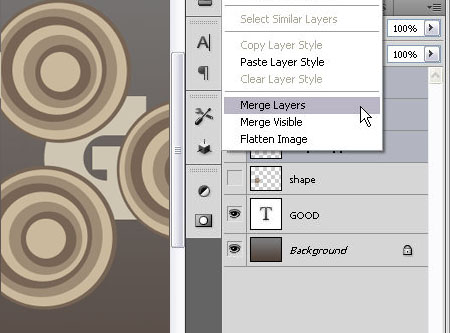
- Once you’re done placing the layers around the letter, Ctrl + select all the shape layers for that letter, right click on any of them, and choose Merge Layers to merge them in one layer.
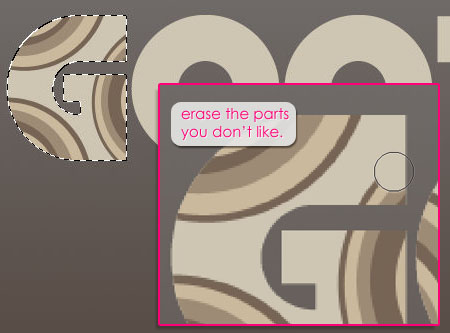
- Now, it’s time to remove the extra parts, so Ctrl + click on the icon of the original TEXT layer to create a selection.
- Then, make sure that the SHAPE layer is the active (selected) layer. You can erase any parts you don’t want.
- Go to Select -> Inverse or press Shift + Ctrl + I to invert the selection, and hit Delete. Step 4:
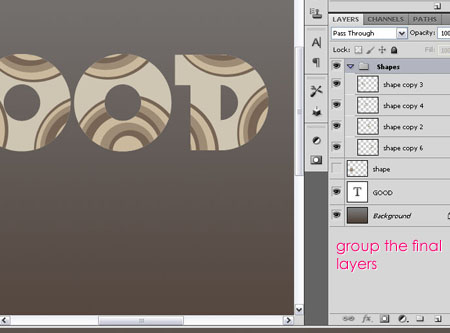
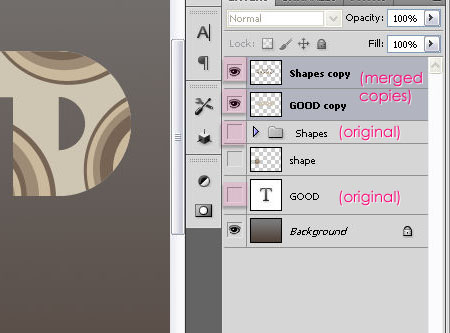
- It’s always good to keep a copy of the original layers before merging or rasterizing them. So make a duplicate of the "Shapes” group and the original Text Layer. Right click -> Merge the group, and right click -> Rasterize the text layer. Don’t forget to make the original layers invisible.
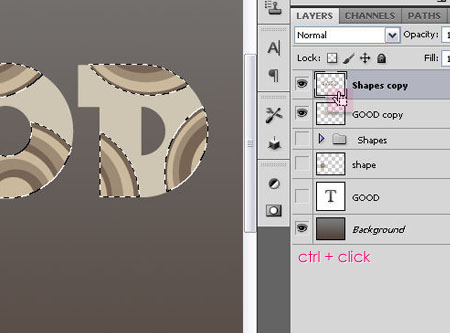
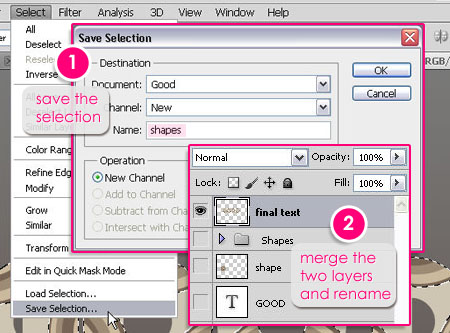
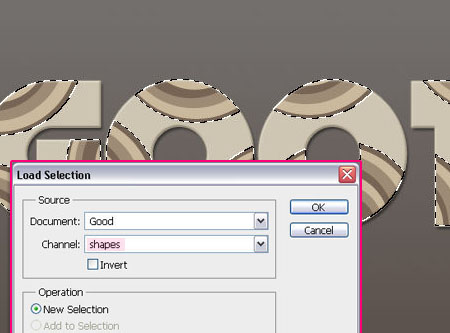
- Now, we are going to save a selection of the circles before merging them with the text, so Ctrl + Click on the icon of the circles layer ("Shapes copy”), then go to Select -> Save Selection, and type in a name for the selection. After that, select the circles layer and the text layer, and press Ctrl + E to merge them. Rename the final layer to "final text”.
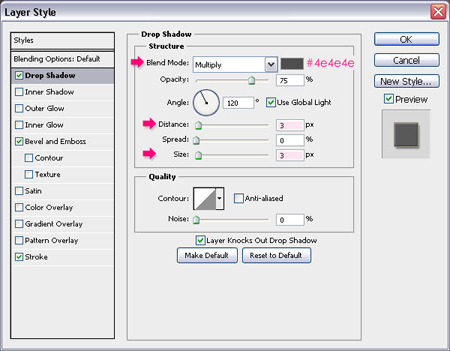
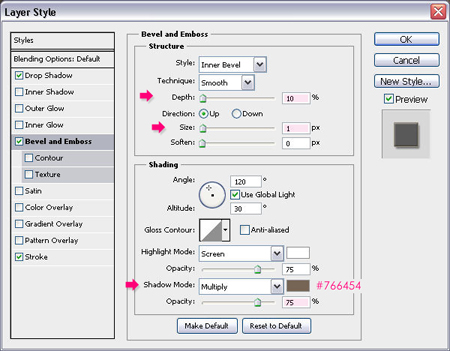
Step 5: Double click on the merged "final text” layer, and apply the following styles: - A simple Drop Shadow, use the color #4e4e4e, change the Distance and the Size values to 3px.
- Apply a Bevel and Emboss with the Depth of 10%, change the Size to 1px, and change the Shadow Mode color to #766454.
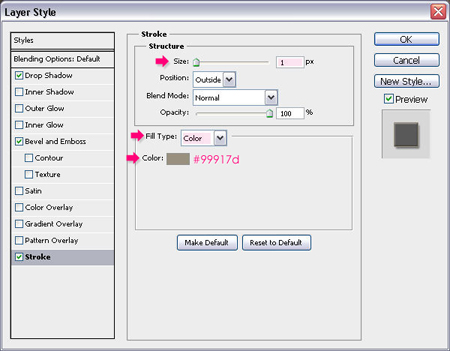
- Finally, apply a thin Stroke, change the Size to 1px, and use the color #99917d.
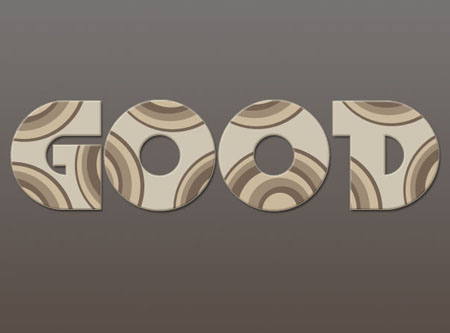
The result should look something like this.
Step 6:
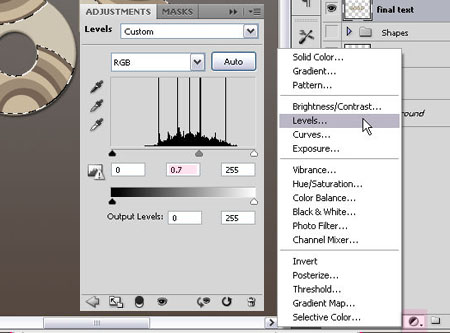
Add a Levels adjustment layer on top of the rest of the layers you have, change the Gamma (middle) value to 0.7. This will darken the circles a little bit, making the colors more vibrant.
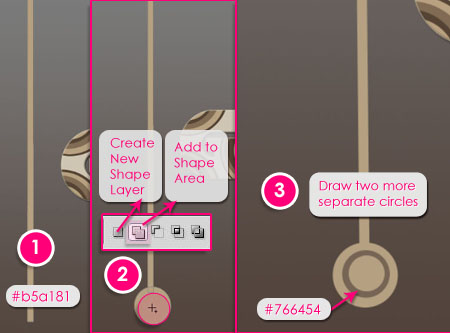
Step 7: - It’s time to create the Background stuff now. Using the Rectangle Tool, draw a long but really thin rectangle vertically. Choose a light shade of the colors you are using in the effect. The color used here is #b5a181. - Switch to the Ellipse Tool, and from the top menu click the Add to Shape area icon, so that the circle you’ll draw will be added to the rectangle in ONE shape (on the same layer), which will make changing their color later on easier, and draw a circle at the end of the rectangle. - After that, click the Create New shape Layer icon so that you are no longer adding shapes to this one, and draw two more circles (in two different layers). - Using a darker shade of the color you’ve chosen, fill the shape in the middle, then, put all the shapes in a group together.
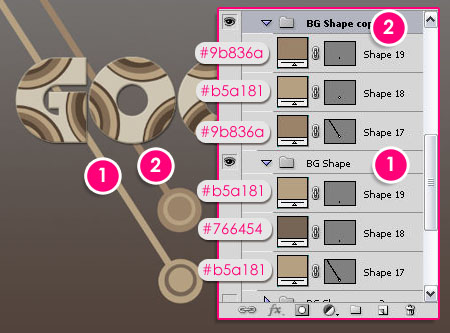
Step 8: Select the group, press Ctrl + T, and rotate it a little bit. After rotating the group, duplicate it. Move the copy away from the original, and change its position the way you like. Before creating more duplicates, we need to inverse the fill colors of the new group’s shapes so that they are the opposite of the original ones. The colors used here are shown in the image below. You can pick your own colors as well.
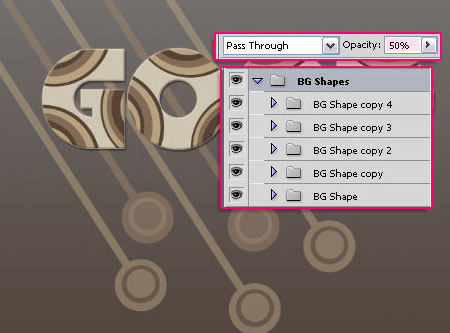
- Continue creating duplicates of both groups and changing their positions until you like the result. After that, put all of the groups you created in one master group, let’s call it "BG Shapes”. Change the "BG Shapes” group’s Opacity to 50%.
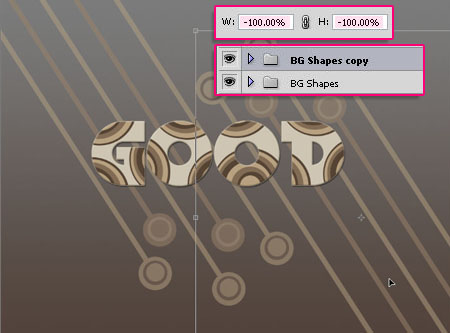
- Duplicate the "BG Shapes” group, and with the new copy selected, press Ctrl + T. On the top menu, add a - (minus sign) to the W (width) and H (height). This will flip the group horizontally and vertically. Move the groups around until you’re satisfied with the result.
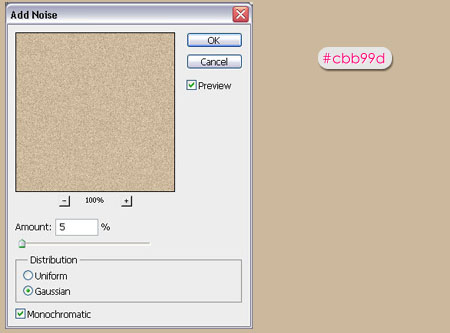
Step 9: Create a new layer on top of all the layers you have, and fill it with the color #cbb99d. Then go to Filter -> Noise -> Add Noise, change the Amount to 5%, the Distribution to Gaussian, and check the Monochromatic box.
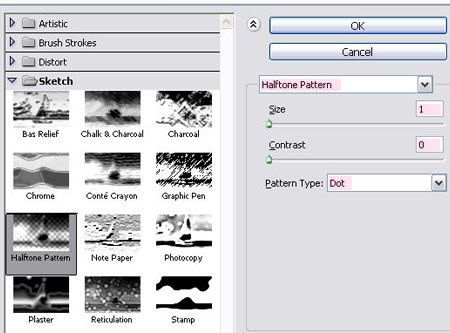
Go to Filter -> Sketch -> Halftone Pattern, change the Size to 1, the Contrast0, and the Pattern Type to Dot. to
Click OK, and change the layer Blend Mode to Overlay. Step 10: Under the last layer you created, put this Grunge Texture in a separate layer. Resize it if you like, then go to Image -> Adjustments -> Hue/Saturation or simply press Ctrl + U, and change the Saturation value to -100.
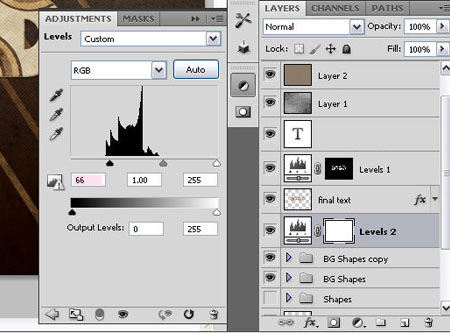
Click OK, and change the layer Blend Mode to Overlay as well. Step 11: Finally, We’ll be adding another Levels adjustment layer, beneath the "final text” layer, and above the Background layers. Change the Shadows (first – black point slider) value to something around 66 to darken the background.
And… We’re Done! |
|
|


| Total comments: 2 | |||||||
Copyright MyCorp © 2026 |
 Thebusinessalert.com Thebusinessalert.com
| |||||||


