Home » 2011 » March » 13 » Driver Verifier -How To Enable and Disable It
9:22 PM
Driver Verifier -How To Enable and Disable It

Driver Verifier -How To Enable and Disable It!!!


OPTION ONE

To Enable Driver Verifier
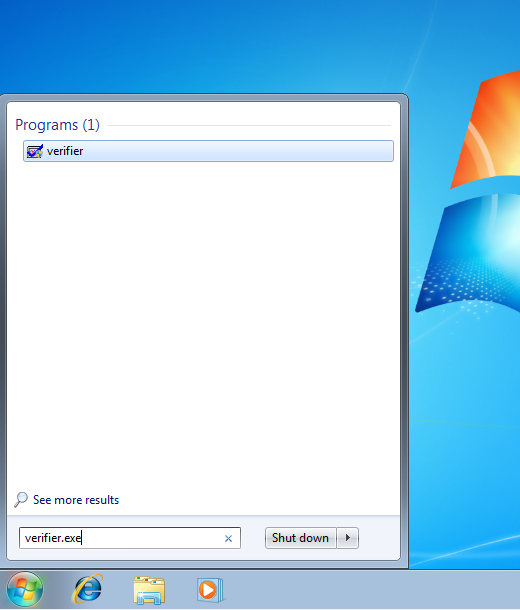
1. Start typing verifier.exe into the start menu, and open Verifier.
Driver Verifier - Enable and Disable-snip1.png
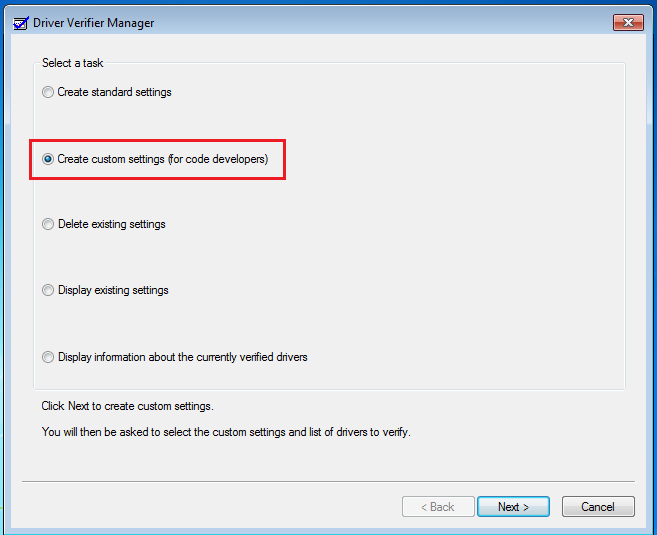
2. Select "Create custom settings (for code developers)", and hit Next.
Driver Verifier - Enable and Disable-snip2.png
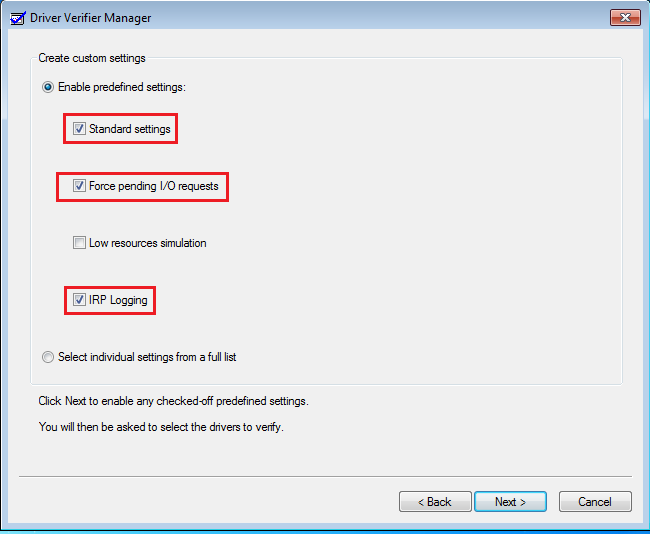
3. Make sure Standard settings, Force pending I/O requests, and IRP Logging are selected, and hit Next.
Driver Verifier - Enable and Disable-snip3.png
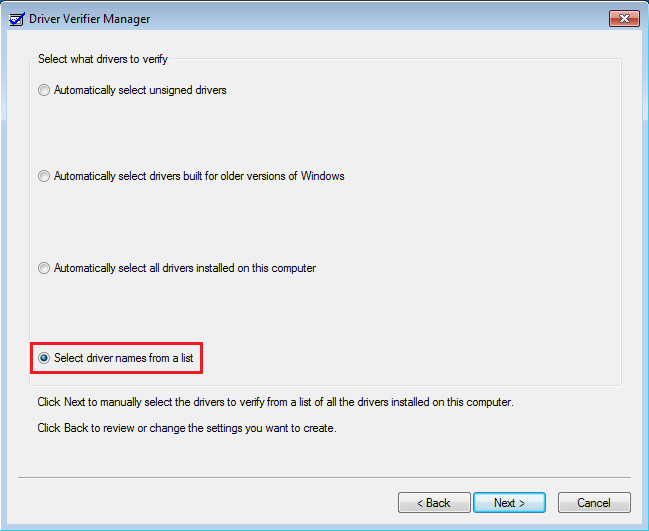
4. Select "Select driver names From a list", and hit Next.
Driver Verifier - Enable and Disable-snip4.png
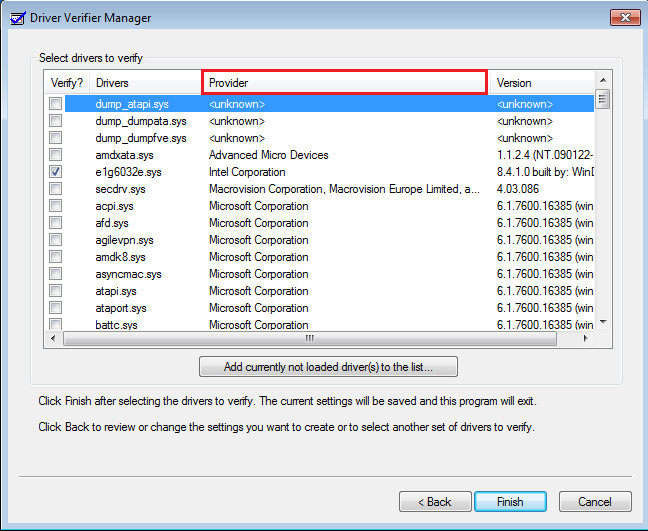
5. Click on "Provider" at the top to sort the list by manufacturer. Select all drivers not provided by Microsoft Corporation. The only other drivers that do not get selected are amdxata.sys, and secdrv.sys.
Driver Verifier - Enable and Disable-snip5.png
6. Press Next, and OK to the resulting window.
Driver Verifier - Enable and Disable-snip6.png
After a reboot, driver verifier should be enabled.


OPTION TWO

To Disable Driver Verifier
1. Start typing verifier.exe into the start menu, and open Verifier.
Driver Verifier - Enable and Disable-snip1.png


2. Select "Delete existing settings"
Driver Verifier - Enable and Disable-snip7.png


If you cannot get into Windows to turn off Verifier, try using Safe Mode.

Category: Computer Zone | Views: 1587 | Added by: Freshers | Tags: Hardware & Drivers, Gurus Windows, Gurus Tutorials | Rating: 5.0/1
Total comments: 1
0  
1 seniorkoa   (2011-06-12 4:54 AM) [Gurus Entry]
Thanks to Freshers for this post.
The screenshots are also suitable for such tutorials. deal flower hands hands

Only registered users can add comments.
[ Sign Up | Log In ]