Home » 2011 March 07 » How to set up No-ip host in 4 steps - Free Dynamic DNS host
10:47 AM How to set up No-ip host in 4 steps - Free Dynamic DNS host |
How to set up No-ip host in 4 steps - Free Dynamic DNS hostMany of the Great have been contemplating about the possibility of setting up free No-ip DNS host. So, check out the article below to set up free Dynamic DNS host - No-ip. Setting up No-ip host:Follow the easy 3 steps below to setup a No-ip free dynamic host: 1. Register an account at No-ip.com. After email verification, login to your account and click on "Add a host" to get this page:  2. Now, fill the information as below: Hostname: Choose anything you want. Here, I have used- cybergaterat. From the adjacent drop down box, select "no-ip.biz" (Don't use any other or it may not work). Leave all things same and hit on "Create host". 3. Now, free download No-ip client and install it on your computer. Run the No-ip client software and enter your No-ip login and password. After successful login, No-ip shows pop-up box like this(if it doesn't show, hit on "Select Hosts"): 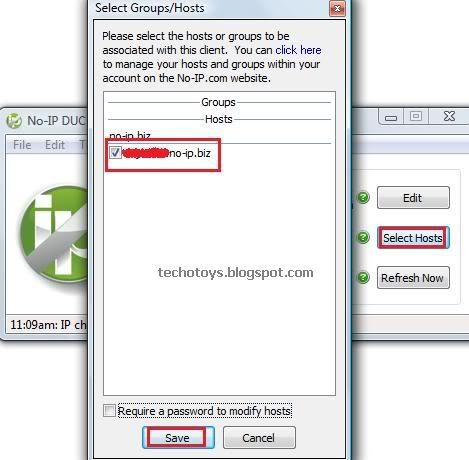 4. Hit on checkbox just besides your host created in step 3 and hit on Save. That's it. You have completed setting up free No-ip host. Now, move back to my Cybergate tutorial to know more on how to setup Cybergate RAT to hack email accounts. I hope you will be able to set up No-ip host in easy 4 steps. If you have any problem in this tutorial on how to setup Free dynamic No-ip host, please mention it in comments. Enjoy setting up No-ip host!!!!!!!!!!!!!! |
|
|
| Total comments: 0 | |
