Home » 2011 » March » 13 » How to Install and Setup Windows XP Mode in Windows 7
7:06 PM
How to Install and Setup Windows XP Mode in Windows 7
Steps To Follow:
1. Go to the Windows Virtual PC website, and do the first two steps for your 32-bit or 64-bit Windows 7 and language. (see screenshot below)
Windows XP Mode - Install and Setup-steps1-2.jpg
2. Afterwards, click on the Windows XP Mode download button in step 3 at that site. (see screenshot below)
Windows XP Mode - Install and Setup-download_xp-mode.jpg
3. Click on Continue for Windows validation. When validation is complete, click on Continue to start the download process. (see screenshots below)
Windows XP Mode - Install and Setup-validation.jpgWindows XP Mode - Install and Setup-validation2.jpg
4. Download and Install Windows XP Mode
A) Click on Save, then save the WindowsXPMode_en-us.exe file to your desktop. (see screenshot below)
Windows XP Mode - Install and Setup-xp-save.jpg
B) Double click on the downloaded WindowsXPMode_en-us.exe installation file to start installing it.
NOTE: The part of the name in red will vary for you depending on what language you selected (step 1).

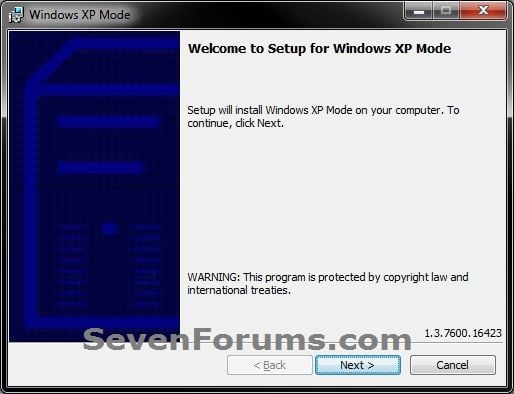
C) Click on the Next button. (see screenshot below)
Windows XP Mode - Install and Setup-install_vxp-1.jpg
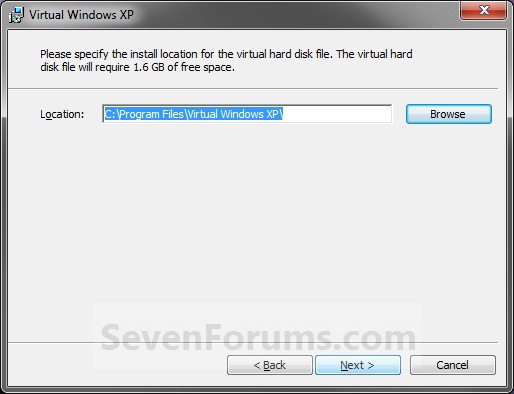
D) Click on the Next button. (see screenshot below)
Windows XP Mode - Install and Setup-install_vxp-uac-2.jpg
E) If prompted by UAC, click on Yes.

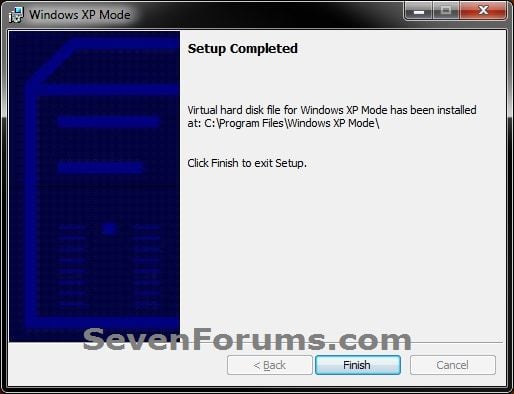
F) When Windows XP Mode is finished installing, click on the Finish button. (See screenshot below)
Windows XP Mode - Install and Setup-install_vxp-3.jpg
5. Download and Install Windows Virtual PC
A) At the Windows Virtual PC website, click on the Windows Virtual PC download button in step 3 at that site. (see screenshot below)
Windows XP Mode - Install and Setup-download_vitual-pc.jpg
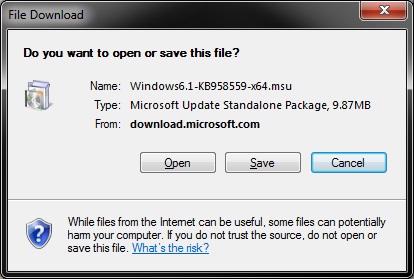
B) Click on Save, then save the Windows6.1-KB958559-x86.msu or Windows6.1-KB958559-x64.msu file to your desktop. (see screenshot below)
Windows XP Mode - Install and Setup-virtual-pc_save.jpg
C) Double click on the downloaded Windows6.1-KB958559-x86.msu or Windows6.1-KB958559-x64.msu file to start installing it.

D) If prompted by UAC, click on Yes.
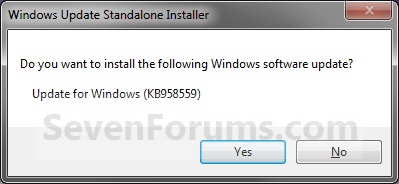
E) Click on Yes. (see screenshot below)
Windows XP Mode - Install and Setup-install-1.jpg
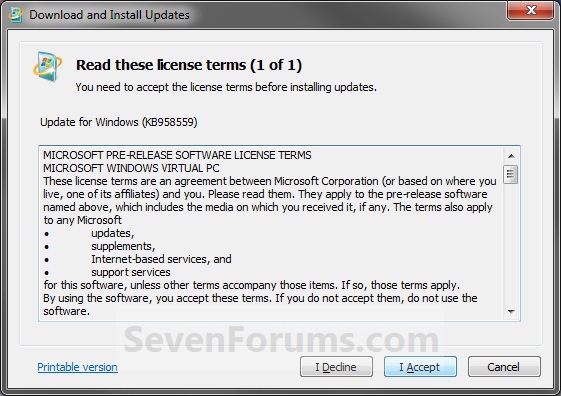
F) Click on the I Accept button. (see screenshot below)
Windows XP Mode - Install and Setup-install-2.jpg
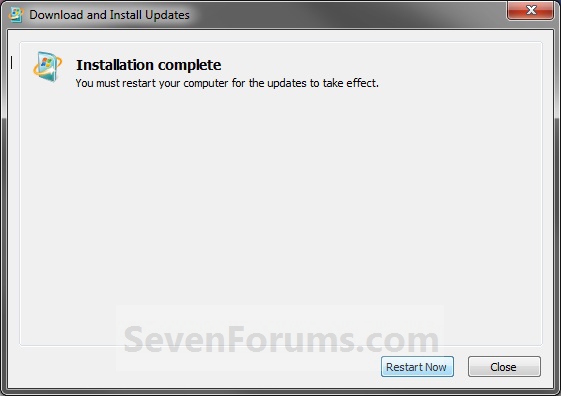
G) When it is finished, click on the Restart Now
WARNING: This will restart your computer immediately. Be sure to save and close anything that you have open first.
button. (see screenshot below)
Windows XP Mode - Install and Setup-install-3.jpg
H) When the computer is finished restarting, continue on to step 6 below.
6. Download and Install Windows XP Mode Update
NOTE: Enables Windows XP Mode for PCs without Hardware Assisted Virtualization Technology. For more information, visit the Frequently Asked Questions page. While the Windows XP Mode Update download may be optional for PCs with Hardware Assisted Virtualization Technology, it will not hurt anything to install it to be safe if you are not sure if you do or not.

Note Gurus  Note
You will not need to download and install the Windows XP Mode Update if you have the Windows 7 SP1 installed since the SP1 already contains it. You can open winver to see if you are running Windows 7 SP1 or not.
A) At the Windows Virtual PC website, click on the Windows XP Mode Update download button in step 3 at that site. (see screenshot below)
Windows XP Mode - Install and Setup-download_updates.jpg
B) Click on Save, then save the Windows6.1-KB8977206-x86.msu or Windows6.1-KB8977206-x64.msu file to your desktop. (see screenshot below)
Windows XP Mode - Install and Setup-xp-mode_updates_save.jpg
C) Double click on the downloaded Windows6.1-KB8977206-x86.msu or Windows6.1-KB8977206-x64.msu file to start installing it.
D) If prompted by UAC, click on Yes.
E) Click on Yes. (see screenshot below)
Windows XP Mode - Install and Setup-update-1.jpg
F) When it is finished, click on the Restart Now
WARNING: This will restart your computer immediately. Be sure to save and close anything that you have open first.
button. (see screenshot below)
Click image for larger version

Name: Install-3.jpg
Views: 964
Size: 49.2 KB
ID: 9321
G) When the computer is finished restarting, continue on to step 7 below.
7. To Open and Run Windows XP Mode
A) Open the Start Menu, then click on All Programs, expand the Windows Virtual PC folder, and double click on the Windows XP Mode shortcut. (see screenshot below)
Windows XP Mode - Install and Setup-step1.jpg
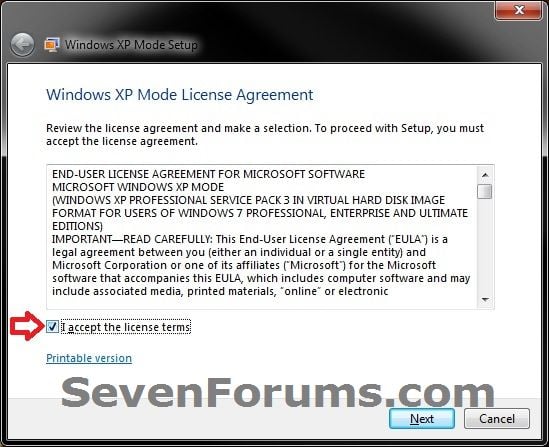
8. Check the I accept box, then click on the Next button. (see screenshot below)
Windows XP Mode - Install and Setup-step1b.jpg
9. Type in a password and type it in again to confirm it, then click on the Next button. (see screenshot below)
NOTE: If you would like to be logged on automatically whenever you open Windows XP Mode (step 7), then check the Remember credentials box.
Windows XP Mode - Install and Setup-step2.jpg
10. Select (dot) the Help protect my computer by turning on Automatic Updates now box, then click on the Next button. (see screenshot below)
Windows XP Mode - Install and Setup-step3.jpg
11. Click on the Start Setup button. (see screenshot below)
Windows XP Mode - Install and Setup-step4.jpg
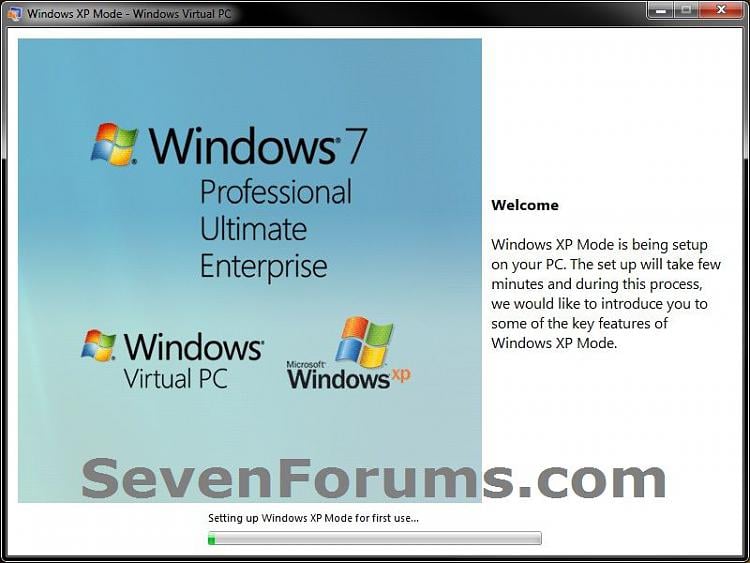
12. You will now see this for a few moments while Windows XP Mode is being setup. (see screeshot below)
Windows XP Mode - Install and Setup-step4b.jpg
13. When setup is finished and you did not check the Remember credentials box in step 9 above, then you will need to enter your password entered and click on OK. If you did, then skip this and continue on to step 14. (see screenshot below)
Windows XP Mode - Install and Setup-step5.jpg
14. The Windows XP Mode - Windows Virtual PC window will now open. You are now in Windows XP Mode. (see screenshot below)
Click image for larger version

Name: Example.jpg
Views: 1960
Size: 57.3 KB
ID: 70764
15. Next, be sure to install Integration Components and enable Integration Features.
NOTE: Sometimes this will be enabled for you automatically during installation.

16. Set Windows XP Mode Settings
A) In the Windows XP Mode window, click on ToolsSettings. (see screenshot above)

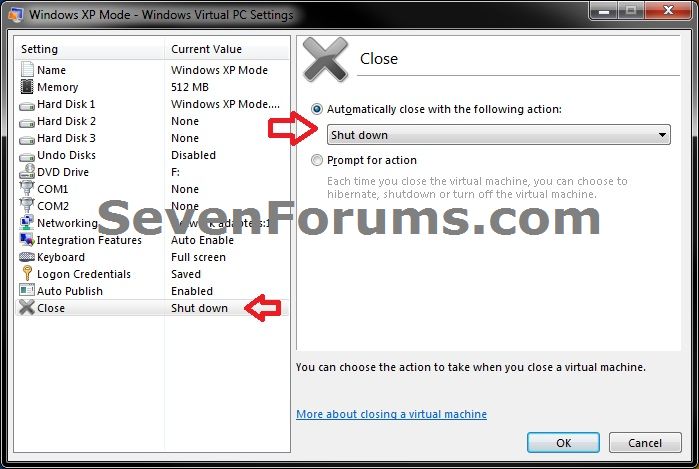
B) In the left pane, select Close/Shut Down. (see screenshot below)
(menu bar) and
Windows XP Mode - Install and Setup-shut-down.jpg
C) In the right pane, select (dot) Automatically close with the following action, then select Shut Down and click on OK. (see screenshot above)
17. To Close Windows XP Mode
A) Click on the X in the upper right corner of the Windows XP Mode window like you would any other window in Windows 7. (see screenshot below step 19)

OR

B) In the Windows XP Mode window, click on ActionClose. (see screenshot below step 19)
(menu bar) and
19. Installing a Program in Virtual Windows XP
NOTE: You would install a program in Virtual Windows XP just like you would in Windows 7 with the same access to everything in Windows 7. For example, hard drives, DVD drives, USB drives, Windows 7 folders and files, etc.....A) After you have installed any program in the Windows XP Mode - Windows Virtual PC, you will notice that there will now be a shortcut to it also in the Windows 7 Start Menu. (see screenshot below)
NOTE: Double clicking on the shortcut in the Windows 7 Start Menu will open and run the program in Windows XP Mode. You can now move or copy this Windows XP Mode program shortcut where you like in Windows 7 for easy use.Windows XP Mode - Install and Setup-installed_programs.jpg
Credit Goes To Sevenforums for their assistance.

Category: Computer Zone | Views: 1668 | Added by: GreatProf | Tags: Gurus Internet, Gurus Tutorials | Rating: 0.0/0
Total comments: 0
Only registered users can add comments.
[ Sign Up | Log In ]